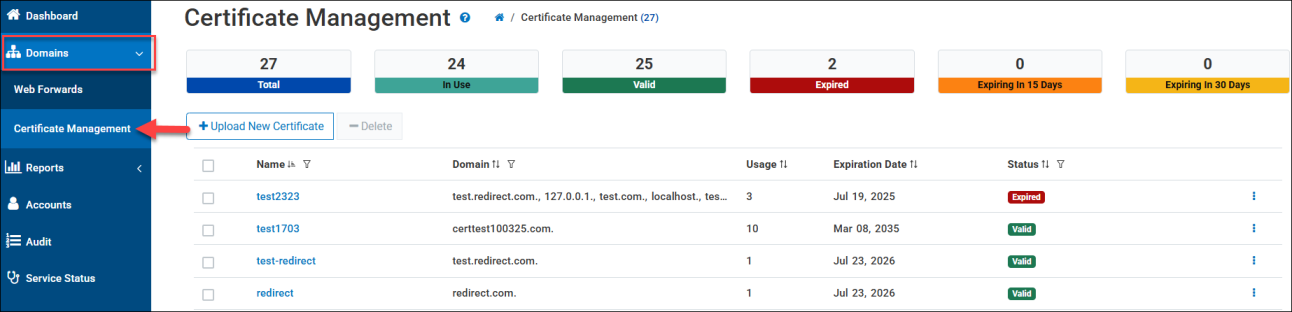
Certificate Management
The Certificate Management dashboard displays the list of SSL/TLS Certificates that are uploaded to the account. These certificates can be applied to HTTPS Redirects (Web Forwarding records) to ensure secure, reliable, and efficient redirection of web traffic.
A banner across the top of the page displays a quick overview of your uploaded certificates:
-
The Total certificates uploaded.
-
The total number of certificates In Use.
-
The total number of Valid certificates.
-
The total number of Expired certificates.
-
The total number of certificates Expiring within 15 days.
-
The total number of certificates Expiring within 30 days.
The Upload New Certificate option allows you to create a certificate, which requires the Certificate and Private Key files to be uploaded, and the optional CABUNDLE file in one of the following supported formats: .pem .key .crt or .cer.
Each uploaded Certificate displays the following details on the Certificate Management page:
-
Name - The certificate name provided during the creation of the certificate.
-
Domain - The list of domains associated with this certificate.
-
Usage - The current number of records this certificate is being applied to.
-
Expiration Date - The exact date by which the certificate expires and is no longer valid.
-
Status - Indicates the certificate is expired or still valid.
-
Additional Options - Clicking the
 icon displays the following actions:
-
Activate the certificate - applies the certificate to a Web Forwards record.
-
Renew an expired certificate - provide new certificate files for an expired certificate.
-
Replace the certificate - provide new certificate files for an existing certificate.
-
Delete the Certificate.c
-
Your Certificates can be applied to a Web Forwards record when selecting the HTTPS Forward option.
Automated Certificate Management
As an alternative to manually providing and maintaining certificates, customers can choose to enable our Managed Certificate feature, which issues an Encrypted Everywhere certificate for HTTPS Web Forwarding that provides a fully managed and automated certificate experience.
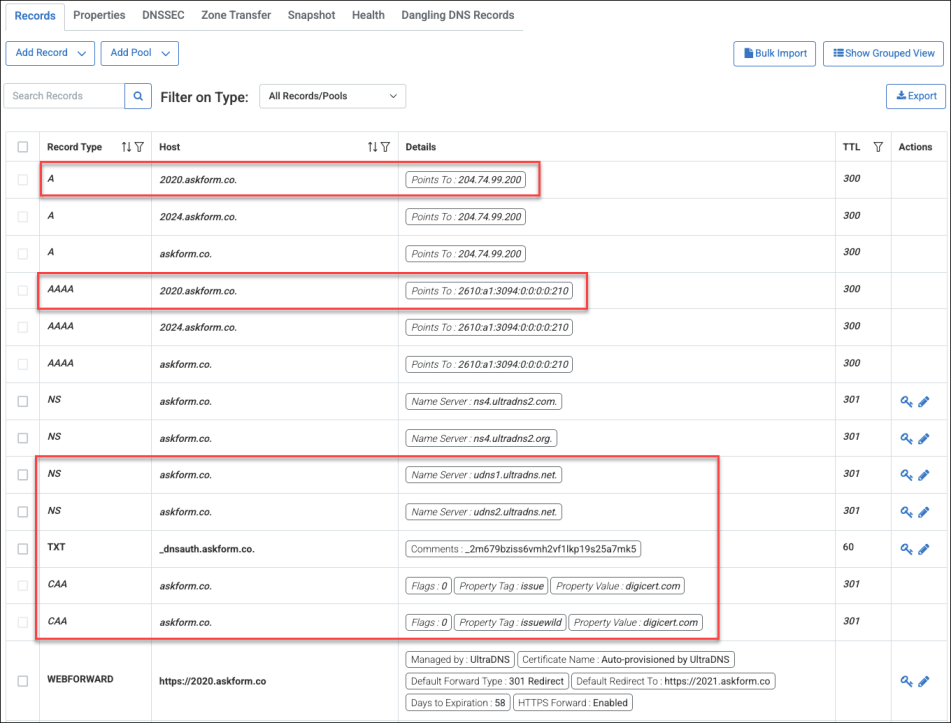
Utilizing our integration with the DigiCert CertCentral service, we handle the issuance, deployment, and renewal of your certificates, as well as creating the necessary CAA and DNS-based Domain Control Validation (DCV) TXT records.
To enable this feature on your account, use the Contact Us page to reach out to our Customer Support team. Additional details about Automated Certificate Management can be found here.
Key Benefits
-
HTTPS 301/302 Redirects: works with path and query strings preserved, supporting permanent and temporary HTTP status codes.
-
Wildcard Domain Support: Works across subdomains with one certificate.
-
Certificates are automatically renewed 7 days before the expiration date.
-
Perfect for protecting all of your domains—even those not hosting active sites—with automated, secure redirects.
-
Securely redirect old domains during rebrand, M&A, or product launches without needing to manage certificates.
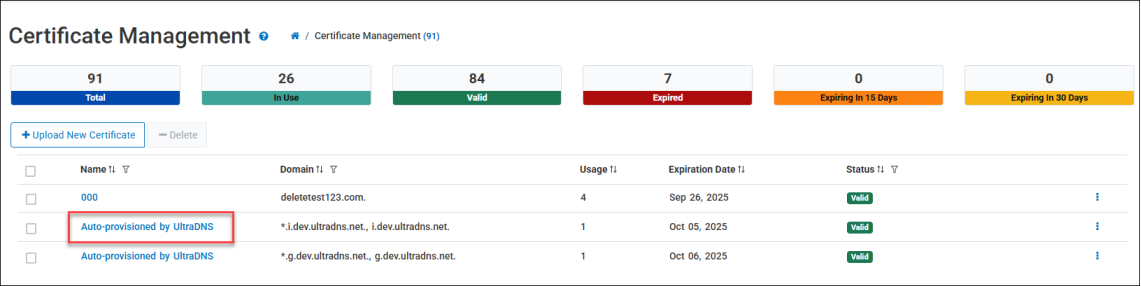
For accounts utilizing the Automated Managed Certificate feature, Name column on the Certificate Management page displays the certificate name as Auto-provisioned by UltraDNS. After initial creation, the status may display Pending for several minutes as the certificate is validated, before displaying Valid.
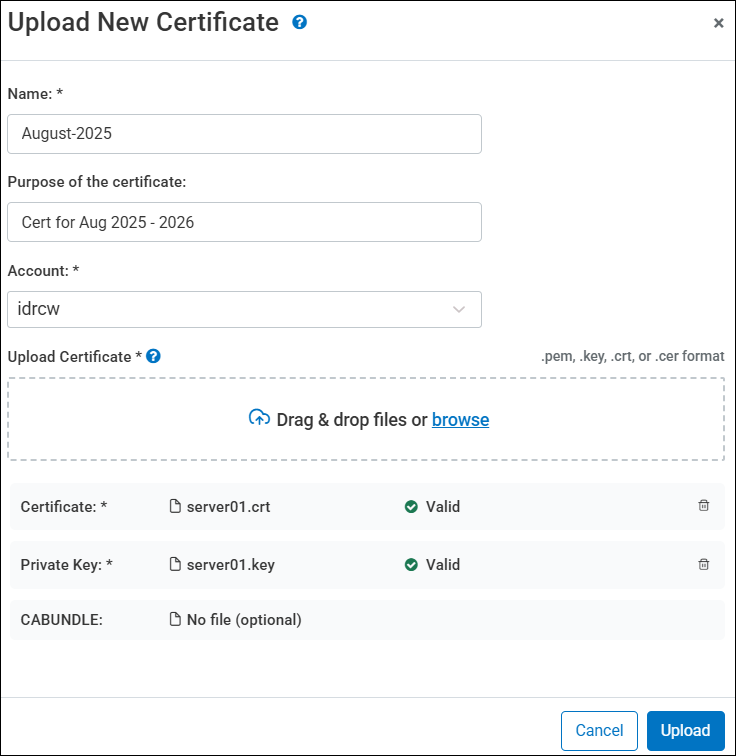
Upload New Certificate
Click the Upload New Certificate option to create a new certificate on the UltraDNS Managed Services Portal. Complete the following fields:
-
Name - Provide a name for the certificate using a maximum of 256 characters.
-
Description - Provide a free-text optional description for the certificate using a maximum of 256 characters.
-
Account - Select the Account in which the certificate will reside from the drop-down menu.
-
Upload Certificate - The Upload Certificate section allows you to drag & drop files, or browse locally and manually upload files.
-
Certificate - Required. The .cer or .crt file extension is supported.
-
Private Key - Required. The .key file extension is supported.
-
CABUNDLE - Optional. The .pem file extension is supported.
-
Click Upload when you have completed all of the required fields. If the file extension types are valid, and the uploaded file details are accurate, a checkmark icon appears next to the file type. Any errors are displayed in a banner message, and must be resolved before you can complete the upload process.
Once successfully uploaded, the new certificate is displayed on the Certificate Management page.
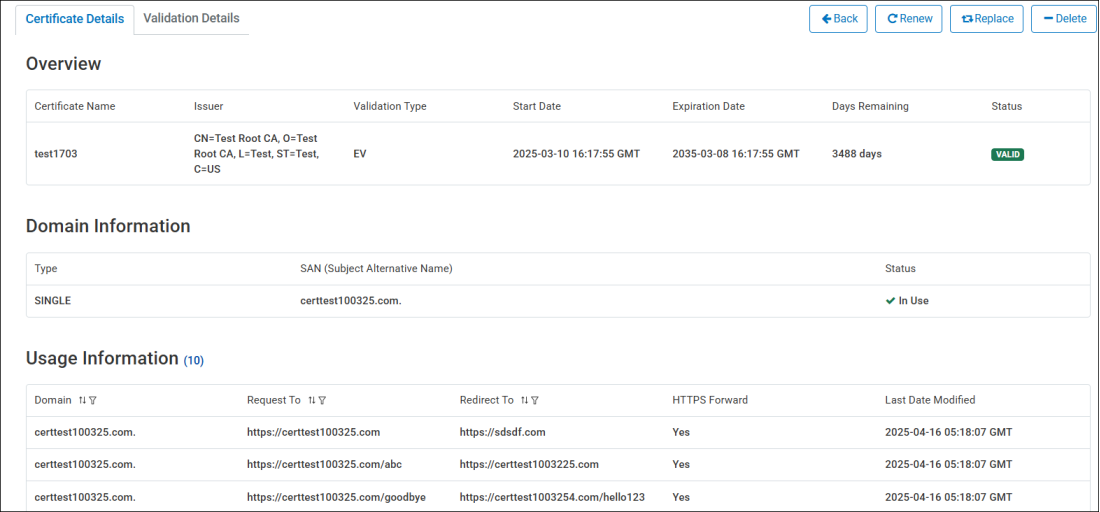
Certificate Details
You can view the Certificate Details by clicking on the certificate name from the Certificate Management dashboard. The Certificate Details displays basic overview information for the certificate, as well as any domains currently utilizing the certificate. Additionally, users can easily perform the Renew, Replace, and Delete actions if needed for the certificate from this section.
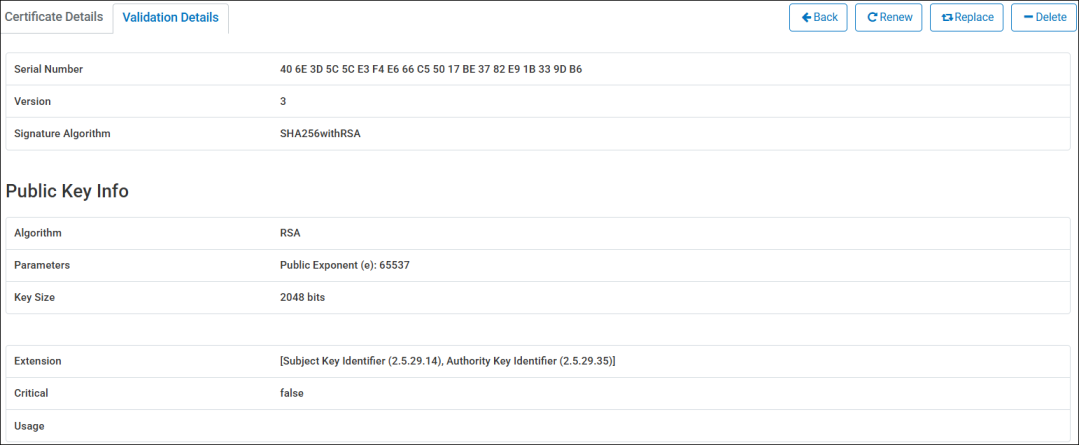
Validation Details
The Validation Details section displays the verified Online Certificate Status Protocol (OCSP) and Certificate Revocation List (CRL) validations that have been performed on the uploaded certificate, as well as validating the trust chain.
Applying a Certificate to a Web Forwards Record
With an uploaded and valid certificate, you can create a secure Web Forwards records HTTPS Redirect.
-
Create a new Web Forwarding record, and toggle the HTTPS Forward option to Yes.
-
Search for your certificate name and select it from the drop-down list.
-
Complete the Request To (which can now be an HTTPS URL), the Redirects To, and the Type fields, and click Save.
-
The Certificate Management page will update the Usage column by 1 indicating the certificate is now being utilized for HTTPS Web Forwarding / Redirecting.
Activate a Certificate
Another way to apply a certificate to a Web Forwarding / HTTPS Redirect is using the Activate function. This allows you to create a new Web Forwards record directly using the selected certificate.
-
From the Certificate Management dashboard, click the
icon and select Activate. -
Alternatively, you can click on the Activate button from the Certificate Details or Validation Details page for the certificate.
-
Complete the required fields and click the Save button, as the certificate is already displayed as being selected.
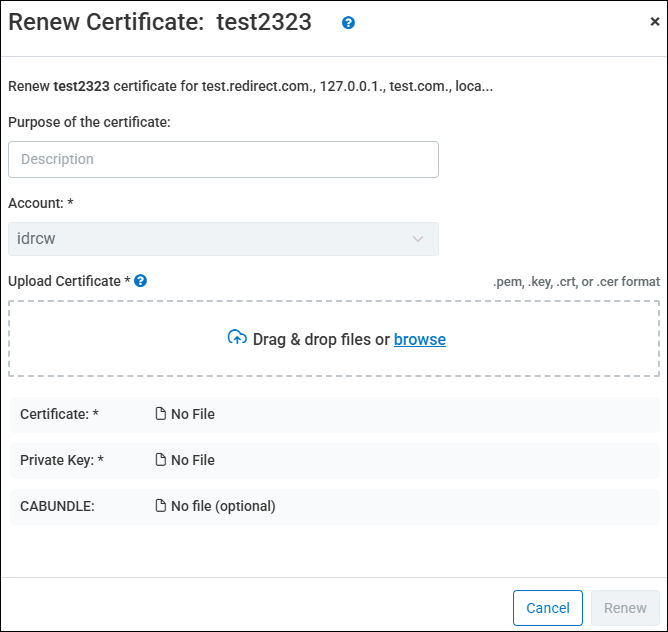
Renew / Replace a Certificate
Whether you need to renew a certificate that is about to expire, or replace existing certificate files, you can use the Renew or Replace feature.
-
Click the Renew or Replace option for your certificate, from either the Certificate Overview page, or the Certificate Management dashboard.
-
You can provide an optional description for the action.
-
Upload the required files using either drag & drop, or browse locally to upload the files.
-
Click Renew or Replace depending on the action being taken.
Delete a Certificate
You can easily delete a Certificate that is either expired or is no longer required. From the Certificate Management dashboard, select the checkbox next to the Certificate Name, and select the icon, and then select Delete.
Additionally, you can delete a certificate from either the Certificate Details or Validation Details page of the certificate.